
Do you stress about seaming up your crochet garments? Is it a struggle to make everything line up correctly and lay flat without bunching? I was totally there too when I had to seam these set-in-puzzle-piece sleeves on a sweater. After searching the interwebz high and low, I found a great solution!
Keep on reading to learn an awesome tip for making the seaming process easy peasy and stress free!
Seaming Dread
Seaming dread is very real! More recently I’ve moved towards making garments that require very little seaming for convenience and the ability to easily try them on as I go. But alas, I had a skeleton in my closet… a forever-wip that I was avoiding, and mostly because it needed a lot of seaming!
The sweater was a gift for my partner that I’d started in early 2020… or quite possibly late 2019. (YIKES). It required seaming the shoulders, attaching the sleeve panels to the body, seaming the sleeve from the cuff to the armpit, and then seaming down the side of the body to the bottom of the sweater.
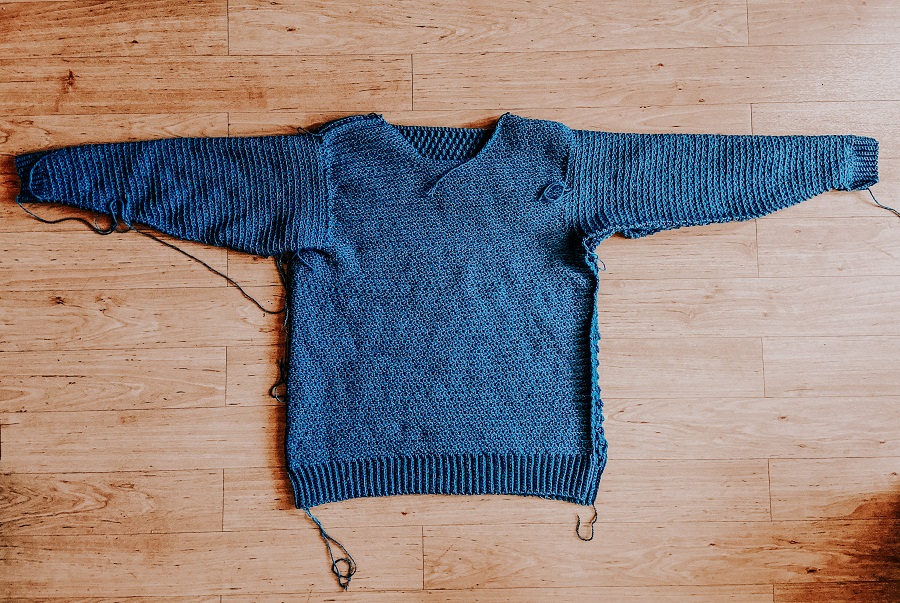
Most intimidating of all, the design has a modified drop shoulder- meaning the shoulder area of the front and back panel are set in. This makes attaching the sleeves feel like a puzzle that doesn’t quite seem to fit.
In that past, I prepared for seaming parties by securing the crochet pieces together with a few stitch markers. I remember struggling along with tiny little beads of sweat rolling down my temple, while attempting to line everything up just right. Sometimes the seam ended up slightly crooked, and I would have to rip it out and redo the whole thing. It drove me completely bonkers.
I felt completely overwhelmed at the thought of seaming the set-in sleeves on this forever-wip sweater, and I was 99% sure that it wasn’t going to work out well. So, I decided it was time to research and try and find some tips to make the seaming less of a nightmare. It was finally time to finish off this beast.
The Golden Ticket for Seaming Crochet Pieces Together
I came up on this video on YouTube that demonstrated a super simple solution for seaming crochet garments. The video shows a couple different options, but the one that clicked for me was to use scrap yarn to hold everything together while you go. It does take a little bit of time to set up, but in the end it can save you stress and the time it takes to redo your seam!
I want to quickly note that I chose to use a different final seaming method than shown in the video, which I will explain more about below.
Here are the 5 steps that I took to seam my sweater with ease:
Materials Needed:
- Smooth Scrap Yarn (in a contrasting color so it doesn’t blend in with your project)
- Stitch Markers
- Tapestry Needle
- Project Yarn (for final seaming)
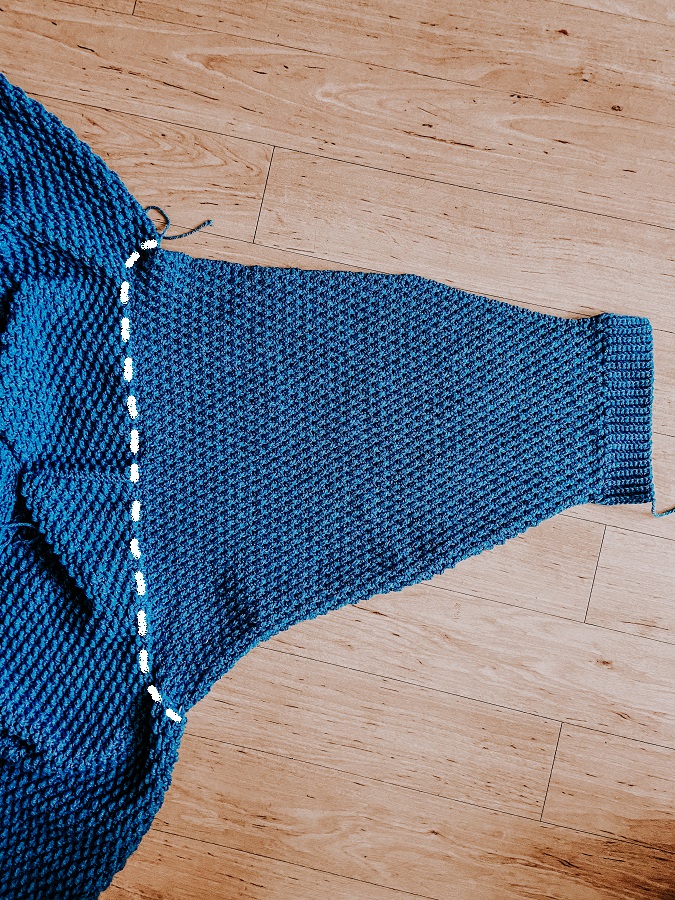
1. Line up the pieces that need to be seamed, as indicated in your pattern.
2. Hold the pieces of fabric that you are connecting together flat like a sandwich (usually with right sides facing in for most seaming techniques, except for mattress stitch). Secure with a few stitch markers where appropriate (e.g. at each edge and at the center).
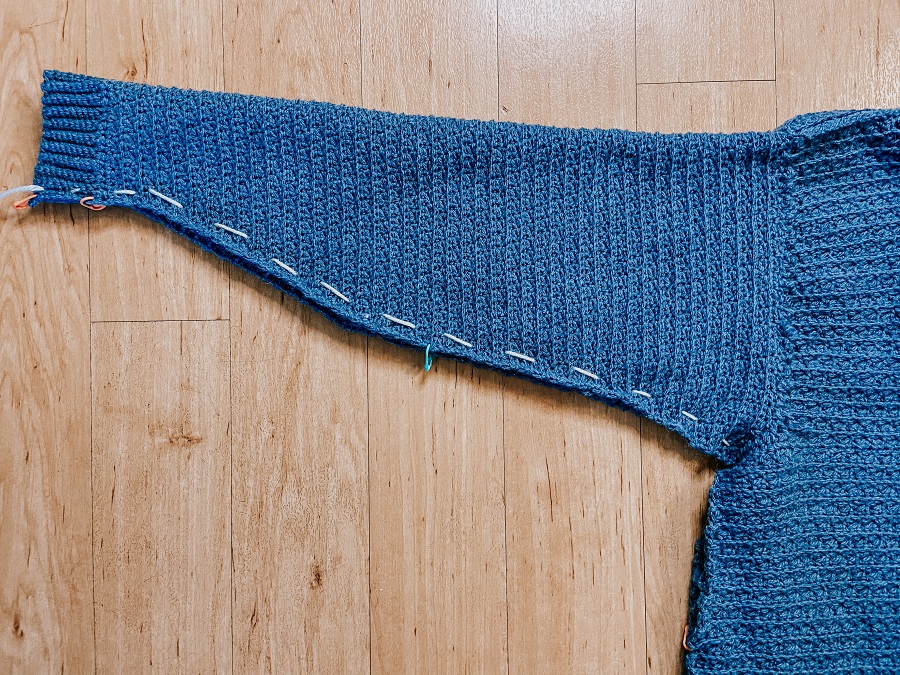
3. THE MAGIC STEP: With a scrap yarn (3 times the length of the seam) weave through both pieces, like a running stitch, approximately ½ inch from the edge where you will be placing the final seam.
This will give you a good idea of how the fabric will lay when the final seam is added. Make adjustments where needed so that it lines up exactly how you want it.
At this point, the stitch markers can be removed, but if you’re worried about it, they can be left in, and removed as you come to them when you put in the final seam.
4. Once you are happy with how it is looking, use your project yarn to secure the seam in your preferred method. Since everything is held together with the scrap yarn, you don’t have to stress about losing alignment, or messing up!
5. Finally, remove your scrap yarn, and weave in any ends!
Quick Note on Seaming Techniques
As for seaming technique, you can follow the instructions included in your pattern, or use your preferred method. I usually like to use a whip stitch with thicker/heavier yarns when extra security and reinforcement is needed. I also like using whip stitch with acrylic yarns that will be machine washed.
When working with lighter yarns and natural fibers, I use the mattress stitch for a flatter, more invisible seam. The mattress stitch method is completed with the right sides of the fabric facing you, and each piece lying side by side rather than sandwiched together.
If you will be using the scrap yarn technique when seaming with the mattress stitch, you will need to remove your scrap yarn as you go in ‘Step 4’ so that you can open your fabric and lay it flat to ensure the mattress stitch is created with the right amount of tension.
Give This Stress Free Seaming Trick a Try!
Holding everything in place with the scrap yarn takes the stress out of seaming. It gives you an accurate preview of how the fabric will lay when seamed. While it takes just a little extra time to prepare, in my opinion it’s so much easier and more secure than using stitch markers alone.
The best use for this technique: seaming set in sleeves! Seriously, it made seaming those puzzle-piece sleeves to the body of the sweater easy as pie!
Go ahead and give this crochet seaming trick a try, and then come back and tell me how it goes in the comments below! I hope it takes away the dread in seaming for you, like it did for me!
P.S. For more content like this and access to exclusive sales, sign up for my newsletter. Snag a free crochet pattern by signing up through the link below!!


 Sore, painful wrists? Tips for pain-free crochet and knitting.