
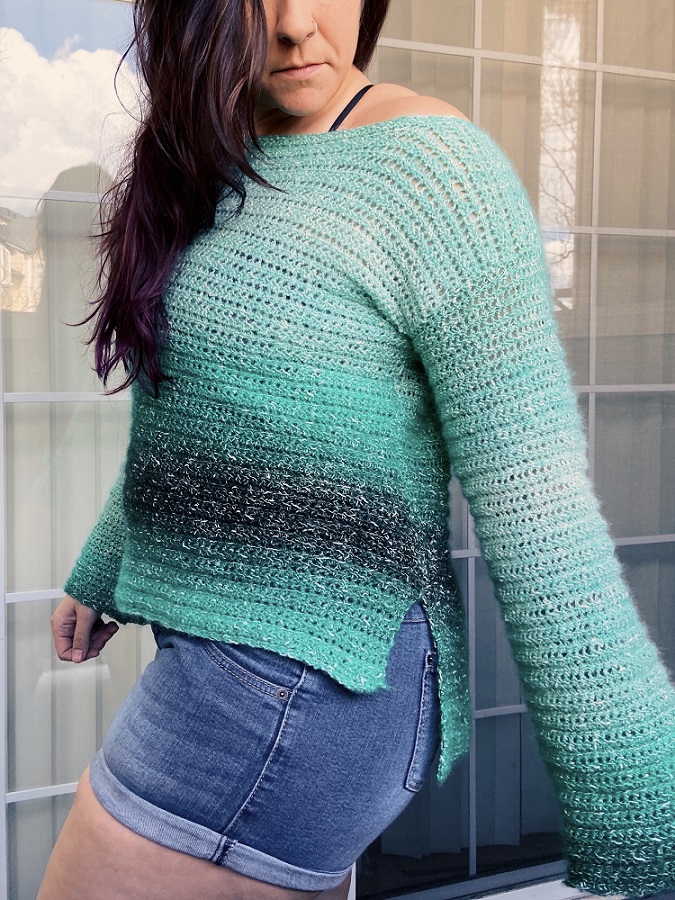
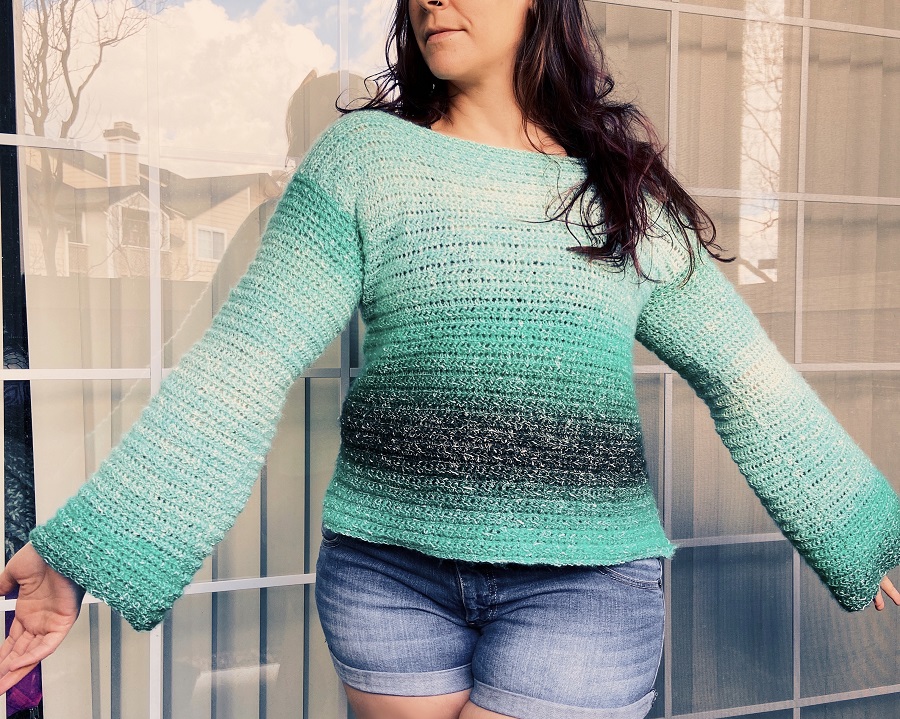
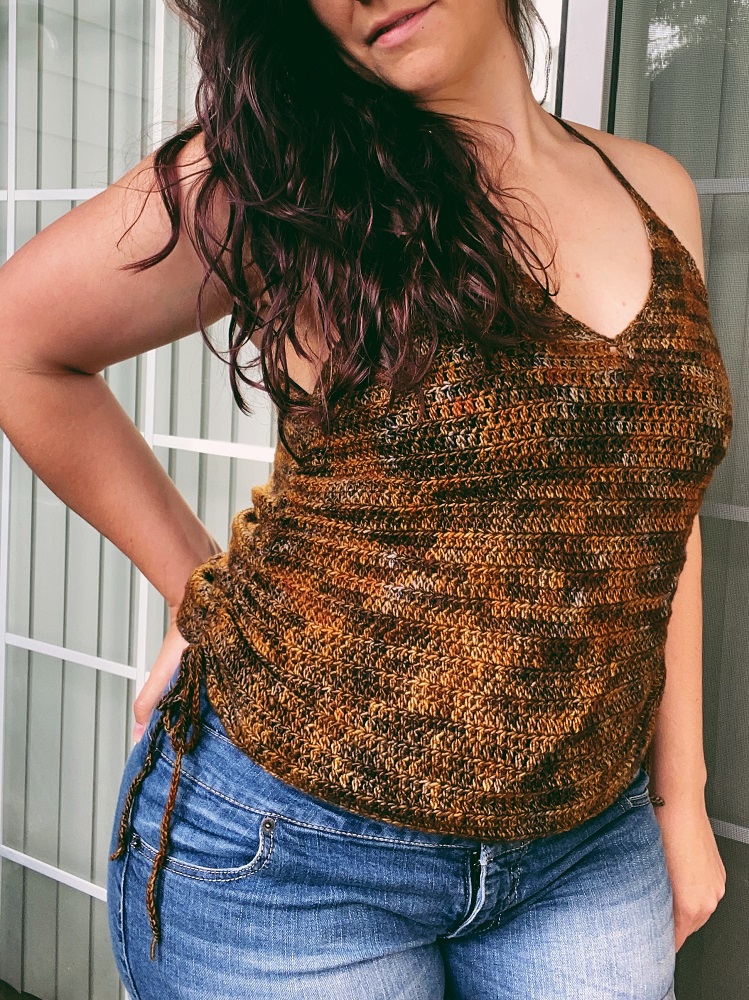
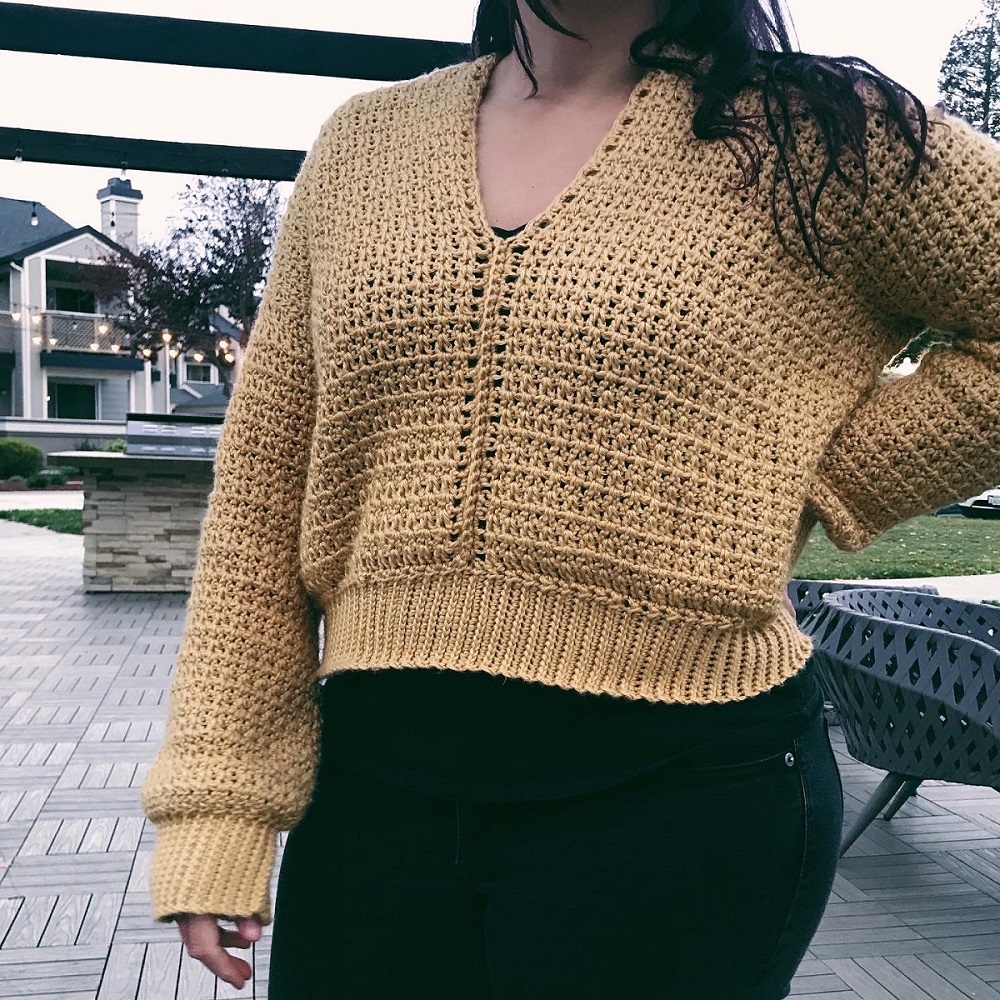
The Ocean Pullover is the perfect sweater to throw over on a chilly summer day at the beach. It’s one of my all time favorite pullovers — and it’s made in Lion Brand Shawl in a Cake (sadly this yarn has been discontinued), which is surprisingly lightweight for a worsted weight yarn!
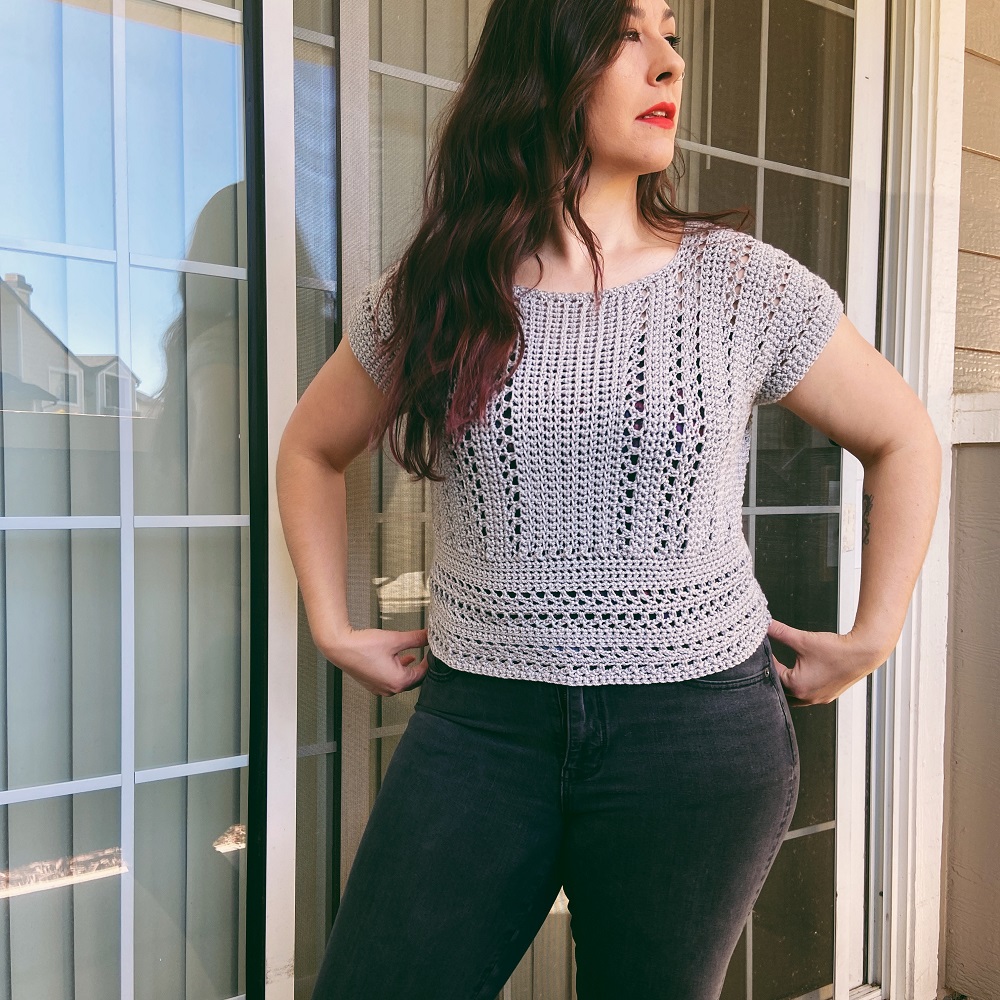
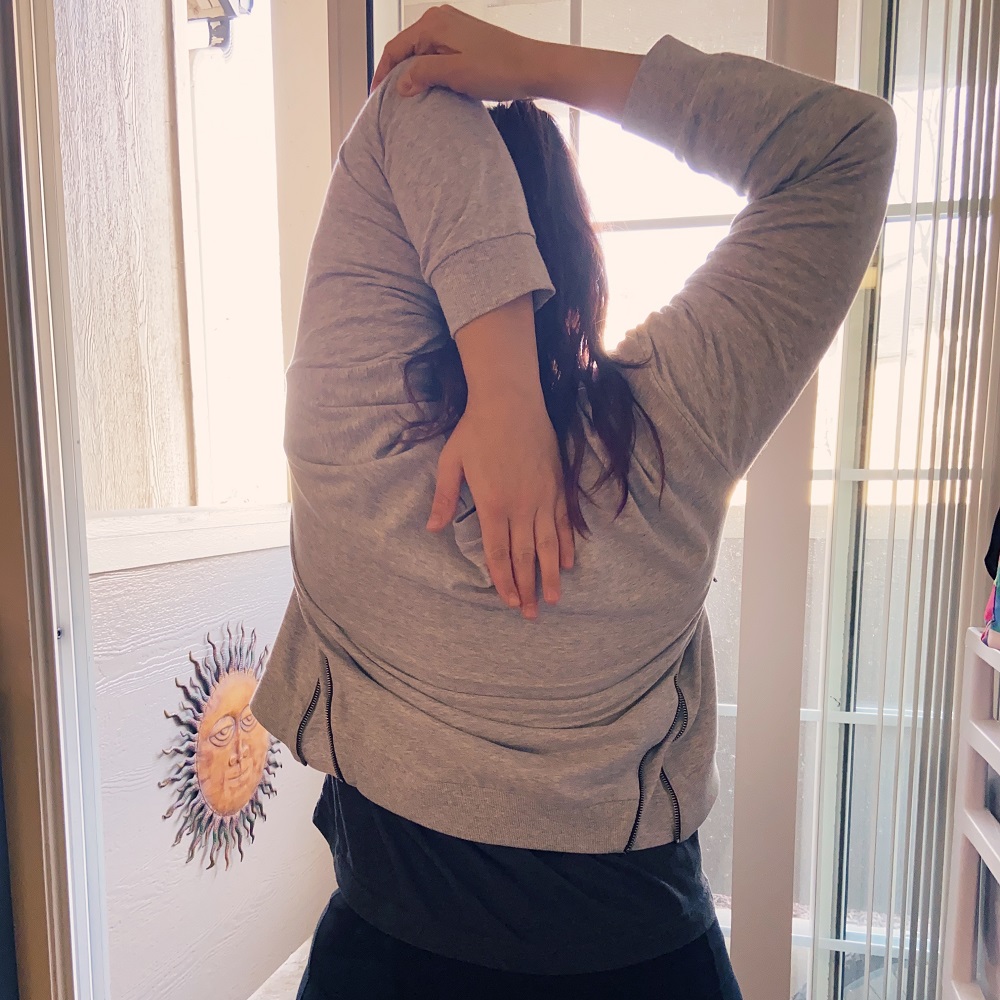
If you’d like to make an easy & relaxed fit pullover, you’re in the right place! This easy crochet sweater pattern features an open neckline, and a stylin’ split hem with a high-low shape.
Keep on reading to learn how to make your own Ocean Pullover Crochet Sweater!
Disclosure: some of the links in this post are affiliate links and if you go through them to make a purchase I will earn a commission at no additional cost to you.
Materials:
- Yarn: Worsted Weight 4 Yarn, a DK Weight 3 may be used if it meets gauge. The Pattern Sample was made with Lion Brand Shawl in a Cake in the color Jade Pool.
- Hook: 5.5mm or whichever size needed to match gauge
- Tapestry Needle
- Stitch Markers
- Tape Measure
- Scissors
Gauge: 15 linked hdc & 11 rows in 4 x 4 inches
Skill Level: Easy
Sizes: XS(S, M, L, XL)((2X, 3X, 4X, 5X))
Note: The approximate finished dimensions are below. Choose the measurements that include the amount of ease that you would like. For example, if your bust is 50 inches and you wanted 1” of positive ease you would choose 2X, OR, if you wanted 5” of positive ease, you would choose 3X.
| Sizes | Finished Bust | Panel Width | Front Panel Length | Back Panel Length | Arm Length | Estimated Yardage |
| XS | 32” | 16” | 21” | 22″ | 19” | 1,200 |
| S | 35” | 17.5” | 21.5” | 22.5” | 19” | 1,300 |
| M | 39” | 19.5” | 21.75” | 22.75” | 19” | 1,400 |
| L | 43” | 21.5” | 22” | 23” | 20” | 1,500 |
| XL | 47” | 23.5” | 22.5” | 23.5” | 20” | 1,650 |
| 2X | 51” | 25.5” | 23” | 24” | 20” | 1,850 |
| 3X | 55” | 27.5” | 24” | 25” | 20” | 2,000 |
| 4X | 59” | 29.5” | 25” | 26” | 20” | 2,200 |
| 5X | 63” | 31.5” | 26” | 27” | 20” | 2,400 |
Techniques and abbreviations (US terms):
linked hdc (LHDC)- this stitch is created by linking back to the middle vertical bar at the base of the previous stitch you have created.
Instructions for LHDC are as follows: Begin the row by inserting hook in 2nd chain from hook (turning chain), yarn over pull through, insert hook in first stitch, yarn over pull through, yarn over pull through 3 loops. Begin the next stitch by inserting hook into the middle vertical loop at the base of the previous stitch, yarn over pull through, insert hook into the next stitch, yarn over, yarn over pull through 3 loops.
Click Here for a Video Tutorial of LHDC
ss- slip stitch
st- stitch
ch- chain
yo- yarn over
inc- increase
ins- insert
cont- continue
dec- decrease
rep- repeat
sk- skip
PM- place marker
approx- approximately
nxt- next
RS- right side
WS- wrong side
R- right
L- left
Pattern Notes:
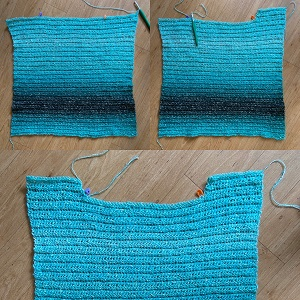
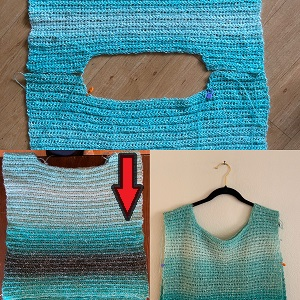
- The sweater is created by making two panels, and two sleeves. The front panel is shorter in length than the back panel to create a high-low effect.
- Panels are worked from the bottom up, then markers are placed to set the neck opening. The shoulder sections are built up on each side of the neckline at the top of the panel.
- The panels are first seamed together at the shoulders. Then the armhole is measured for, and the sides are seamed from the armpit down towards the bottom of the sweater.
- There are two options for creating the sleeves. The sleeves may be worked in the round, OR they may be worked flat and then seamed lengthwise before joining them to the body of the sweater.
Download the ad-free pattern pdf HERE
Crochet Pattern Instructions
Back Panel:
Ch 62(68, 75, 82, 90)((98, 105, 113, 120))
R1: Begin LHDC by ins hk in 2nd ch from hk, yo, pull through. Ins hk in next ch, yo, yo pull through. Ins hk in middle vertical bar at the base of the previous stitch, yo pull through, ins hk in nxt st, yo, yo pull through. Cont placing 1 LHDC in each ch across. Ch 2 and turn.
60(66, 73, 80, 88)((96, 103, 111, 118)) LHDC
R2: ins hk in 2nd ch from hk, yo, pull through. Ins hk in first st, yo, yo pull through. Cont placing 1 LHDC in each st across until the end of the row. Ch 2 and turn.
60(66, 73, 80, 88)((96, 103, 111, 118)) LHDC
Repeat R2 for 61(62, 63, 64, 65)((66, 69, 72, 74)) Rows
Move on to “Creating the Shoulders”.
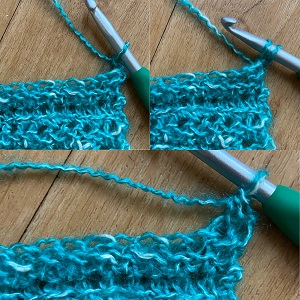
Starting the Row- Linked HDC
Top L: ch 2
Top R: ins hk in 2nd ch from hook, yo pull through (2 loops on hk)
Bottom: ins hk in nxt st, yo pull through, yo pull through 3 loops
Creating the Shoulders- The Set Up:
Count 14 (17, 19, 21, 25)((28,31,35, 38)) sts from the R side of the top of the panel and PM. Then Count 14(17, 19, 21, 25)((28,31,35, 38)) sts from the L side and PM.
Top R: PM for L & R shoulder
Top L: complete rows for first shoulder
Bottom: complete rows for second shoulder
Right Side Shoulder:
R1: Continue working in pattern- ins hk in 2nd ch from hk, yo pull through, ins hk in first st, yo, yo pull through. 1 LHDC in each st, stop after placing a LHDC in the same place as the R side marker. Ch 2 and turn.
14(17, 19, 21, 25)((28, 31, 35, 38)) LHDC
R2: Rather than working in the 2nd ch from hk first, ins hk into first st, yo pull through, ins hk into nxt st, yo, yo pull through. (1 dec made) 1 LHDC into each stitch until the end of row. Ch 2 and turn.
13(16, 18, 20, 24)((27, 30, 34, 37)) LHDC
R3: Ins hk in 2nd ch from hk, yo pull through, ins hk into first st, yo, yo pull through. Cont place 1 LHDC in each st across. Ch 2 and turn.
13(16, 18, 20, 24)((27, 30, 34, 37)) LHDC
R4: R2: Rather than working in the 2nd ch from hk first, ins hk into first st, yo pull through, ins hk into nxt st, yo, yo pull through. (1 dec made) 1 LHDC into each stitch until the end of row. Cut and tie.
12(15, 17, 19, 23)((26, 29, 33, 36)) LHDC
Left Side Shoulder:
R1: Attach yarn with a SS one st to the R of the L side marker. Ch 2, ins hk in 2nd ch from hk, yo pull through, ins hk in st with marker, yo, yo pull through. Continue working in pattern- 1 LHDC in each st to the end of the row. Ch 2 and turn. 14(17, 19, 21, 25)((28, 31, 35, 38)) LHDC
R2: Ch 2, ins hk in 2nd ch from hk, yo pull through, ins hk in the first st, yo, yo pull through. Cont working 1 LHDC in each st across leaving the last st unworked. SS into the last st (1 dec made) Ch 2 and turn.
13(16, 18, 20, 24)((27, 30, 34, 37)) LHDC
R3: ins hk in 2nd ch from hk, yo pull through, ins hk in the first st, yo, yo pull through. Cont working 1 LHDC in each st across until the end of the row. Ch 2 and turn. 13(16, 18, 20, 24)((27, 30, 34, 37)) LHDC
R4: Ch 2, ins hk in 2nd ch from hk, yo pull through, ins hk in the first st, yo, yo pull through. Cont working 1 LHDC in each st across leaving the last st unworked. SS into the last st (1 dec made) Cut and Tie.
12(15, 17, 19, 23)((26, 29, 33, 36)) LHDC
Front Panel:
Ch 62(68, 75, 82, 90)((98, 105, 113, 120))
R1: ins hk in 2nd ch from hk, yo, pull through. Ins hk in next ch, yo, yo pull through. Cont placing 1 LHDC in each ch across. Ch 2 and turn.
60(66, 73, 80, 88)((96, 103, 111, 118)) LHDC
R2: ins hk in 2nd ch from hk, yo, pull through. Ins hk in first st, yo, yo pull through. Cont placing 1 LHDC in each st across until the end of the row. Ch 2 and turn.
60(66, 73, 80, 88)((96, 103, 111, 118)) LHDC
Repeat R2 for 57(59, 60, 61, 62)((63, 66, 69, 72)) Rows
Repeat the same instructions for “Creating the Shoulders”.
Seaming the Shoulders:
Place the front panel over the back panel, inside out (RS together, WS facing you), and seam the shoulders together in whichever method you prefer leaving the neck sts unworked. Since the weight of the sweater hangs from the shoulders, I’d recommend using SS as it produces strong reinforcement.
Creating the Armhole:
Measure 6.5(7, 7.5, 8, 8.5, 9)((9, 9.5, 10, 10.5)) inches from the shoulder seam down the side of the panels and PM through the front and back panel. I like to put the garment on a hanger to help line things up. Double check that there are the same amount of rows from the shoulder down to the marker for the front and back panels, and from one side to the other.
Seaming the Sides:
Seam from the armpit down to the bottom of the sweater, leaving approx 6” or however much you want to be open and un-worked at the bottom. You can seam the sides however you like, I used the mattress stitch.
Top R: seam panels together at shoulders
Bottom L: measure for armhole, PM
Optional Step-Bottom R: using a hanger, hang from shoulder seam and align markers through the front panel & back panels
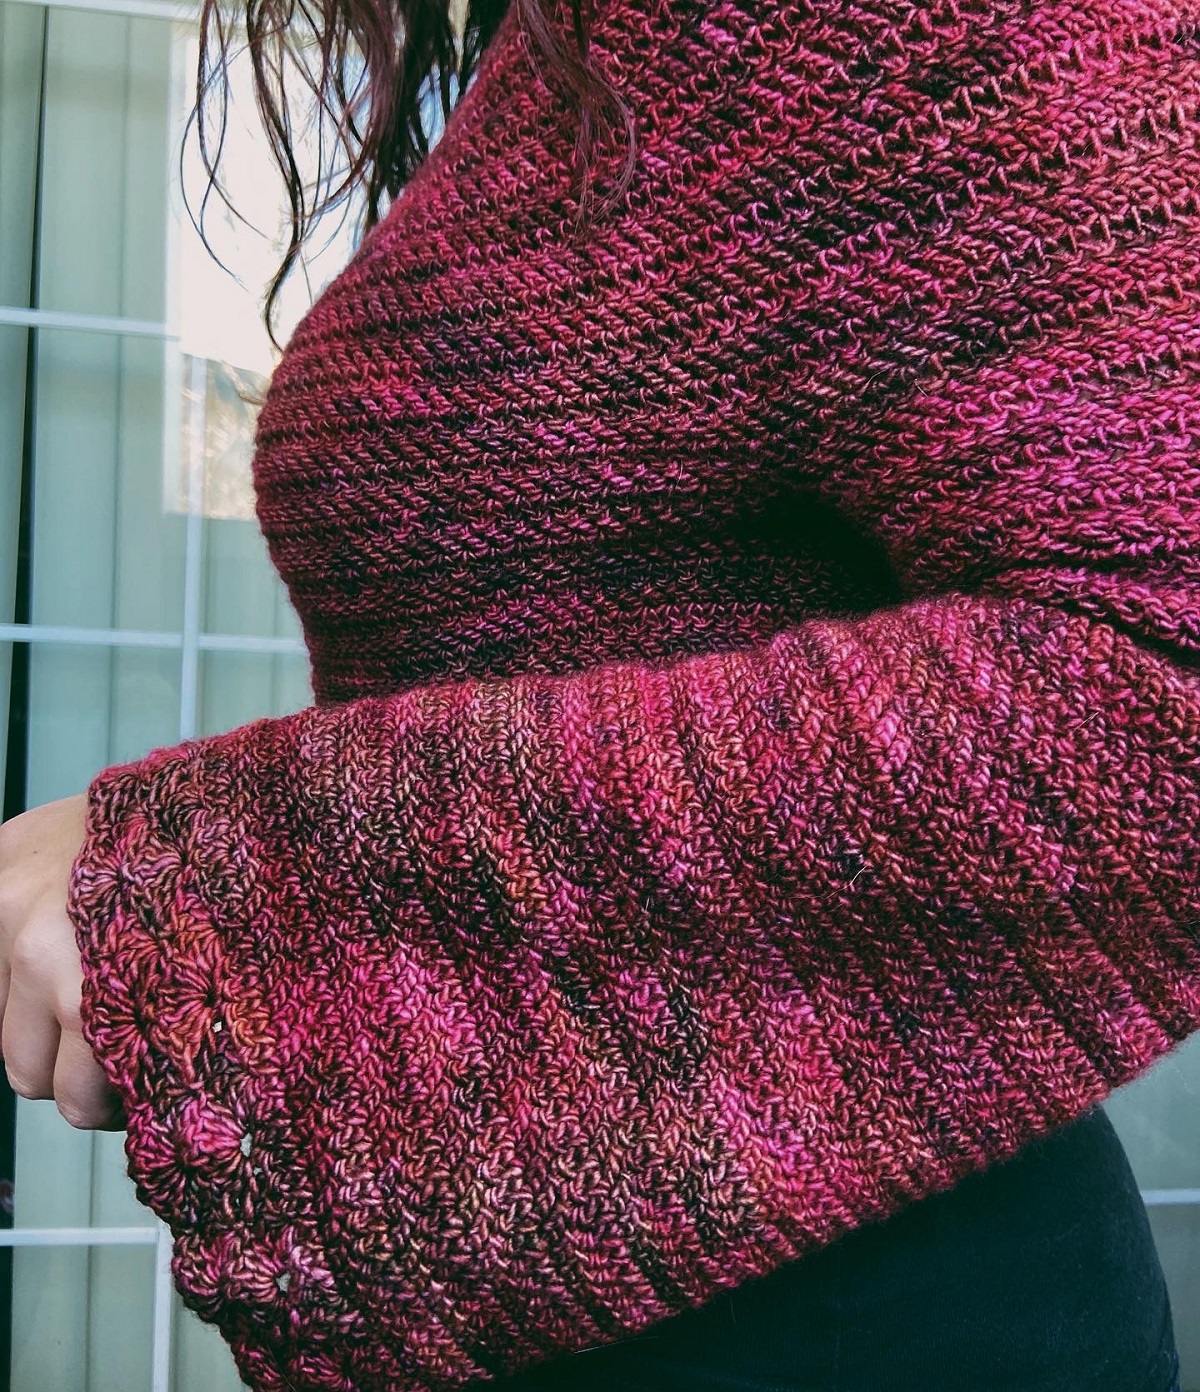
The Sleeves (Make 2)
Working the Sleeves in the Round: If you want to work the sleeves flat then skip ahead to the nxt section
Ch 49 (53, 56, 60, 64) ((68, 71, 75, 79)) Connect to the first ch with a ss, ensuring that the ch isn’t twisted.
R1: Ch 2, ins hk in 2nd ch from hk, yo, pull through. Ins hk in same sp as ch 2, yo, yo pull through. Cont placing 1 LHDC in each ch around. Ch 2 and turn.
49 (53, 56, 60, 64) ((68, 71, 75, 79)) LHDC
R2: Ins hk in 2nd ch from hk, yo, pull through. Ins hk in next st, yo, yo pull through, cont placing 1 LHDC in each st around with the last LHDC going in the same sp as the ch 2. Ch 2 and turn.
49 (53, 56, 60, 64) ((68, 71, 75, 79)) LHDC
Repeat R2 for approximately 52(52, 52, 55, 55)((55, 55, 55, 55)) rows OR until your sleeve is approx 19-20” long.
NOTE: Arm length can vary greatly, so I recommend you try the sleeve on as you go to check the length. It is okay to add or subtract rows as needed here to ensure the sweater works for your body.
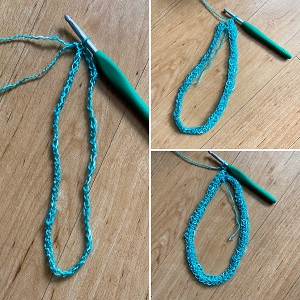
Working the sleeve in the round
Left: make ch, connect with a ss
Top R: LHDC in each ch around Bottom R: connect to first LHDC with a SS, Ch 2 & turn.

Working the sleeve in the round
Top L: the last LHDC of the round goes in this st, the same sp as the ch 2 from the beginning of the round
Top R: ss into the first LHDC
Bottom: after the ch 2 & T, this arrow shows where the first LHDC st goes
Option to Work the Sleeves Flat:
follow these instructions if you don’t want to work the sleeves in the round
Ch 51 (55, 58, 62, 66)((70, 73, 77, 81))
R1: ins hk in 2nd ch from hk, yo, pull through. Ins hk in next ch, yo, yo pull through. Cont placing 1 LHDC in each ch across. Ch 2 and turn.
49 (53, 56, 60, 64) ((68, 71, 75, 79))LHDC
R2: ins hk in 2nd ch from hk, yo, pull through. Ins hk in next st, yo, yo pull through. Cont placing 1 LHDC in each st across. Ch 2 and turn.
49 (53, 56, 60, 64) ((68, 71, 75, 79))LHDC
Repeat R2 for approximately 52(52, 52, 55, 55)((55, 55, 55, 55)) rows OR until your sleeve is approx 19-20” long. *see note on previous page about customizing arm length*
Seam the sleeve together lengthwise to make a tube before attaching to the body.
Attaching the Sleeves:
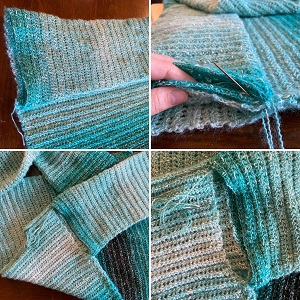
Top L: Lay the sleeve over the body of the sweater with the seam of the sleeve lined up with the side seam.
Top R: Whip stitch the front panel to the front of the sleeve from the armpit to the shoulder seam
Bottom L: Flip over to the back side of the panel and sleeve
Bottom R: Whip stitch the back panel to the back of the sleeve from the shoulder to down to the armpit.
NOTE: When whipstitching the sleeves do not pull yarn too tight, or the seam will pucker & will not lay nicely. Be sure to reinforce the armpit area well, and make sure there are no holes or gaps.
Sign up for my newsletter and get the ad-free pattern pdf HERE.

I hope that you’ve enjoyed following this relaxed fit crochet pullover pattern, and it fits you well! If you have any questions along the way, don’t hesitate to contact me via email at tigerseyehandmade@gmail.com
I’d love to see your finished sweater! If you post it on IG please tag me @tigerseyehandmade & use the hashtag #oceanpullover to share it with the group!


 My Stretching and Mobility Routine for Pain Free Crocheting and Knitting